The Dashboard
From Standout Property Manager Wiki Help
What is the Dashboard?
The dashboard is the main layout of Standout Property Manager, it is how the system is accessed and worked on, and can be broken down into the three areas as listed below.
Toolbar
At the top of your browser, the Toolbar displays options that are available on each and every screen displayed in Standout.
A quick explanation of these options are as follows:-
Version x.x.x What’s New?
Displays the current version of Standout. When a new version is released, the first screen displayed when you log in will be the release notes. This screen does display important information that you should really read. If you want to re-read these notes, click this option to display the release notes (this opens in the new browser tab), close the tab when you’ve finished.
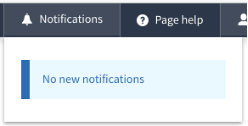
Notifications
If you have any notifications that require your attention, a counter will be display next indicating how many notifications you need to respond to. Notifications may be an upcoming appointment, a brochure that has been converted.
Page Help
Displays a popup help box that explains the current page or section that you have displayed. A link to the full help system should be displayed at the top, opening the full help system in a new browser tab.
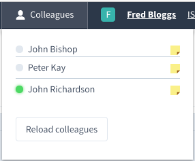
Colleagues
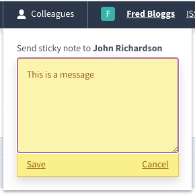
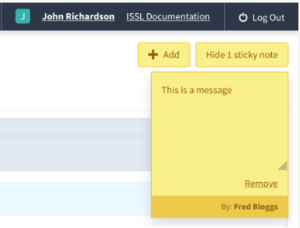
A list of all your fellow colleagues, a green icon indicates that they’re currently logged in. If you want to send them (regardless of their logged in status) a sticky note message, click on the little yellow sticky note to see the following:-
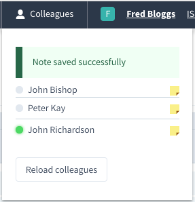
Enter your message and then click Save for it to be displayed on their browser. You will see:-
On your colleagues browser, a Notification will appear in their Toolbar:-
When they go back to the Dashboard, your message will be displayed near the top right of their browser:-
Editing your profile
If you want to change the information, configuration or settings for your Standout profile, click your name:-
Your profile will then open in a new browser tab. Please view our detail documentation regarding your profile configuration.
Log Out
This simply logs you out of Standout and returns you to the Login screen. We recommend doing this when you’re away from your computer/device.
The left hand navigation is how we work woth elements of Standout Property Manager, each element is briefly described below.
Logo Area
The very top of the navigation bar will generally be your own agency logo, and is just used to make the sftware more personal to your own agency.
Quick Search
The quick serach can be used to search for a property or a contact, just type in a name, address, reference number, telephone number or email address then press enter, the system will then return anything that it thinks is valid for the information given.
Dashboard
Selecting Dashboard will return you to the dashboard screen.
Tawk To
Diary
Task list
Properties
Telephone wizard
Add property
Property list
Progress
Rental
Bulk rental payments
Tenant list
Landlord list
Contacts
Add contact
Contact list
Contacts to delete
Hot contacts
Think of Hot contacts as your Hot Box, the list of contacts that you relly want to deal with, cash buyers etc, click here for more information on Hot contacts
Reports
Online Manuals
You guessed, the online manuals is the Standout Wiki pages your reading now.
Administration
Main area
Office 365 Integration
When you have logged into Standout, you can choose to link Standout to your Office 365 account. This will allow appointments to be created in Standout AND in your Outlook Calendar. When you log in, Standout will synchronise appointments (both new and existing future appointments) into your Outlook calendar. If you wish to change an appointment, you must edit them in Standout and NOT Outlook so that synchronisation occurs. If you create an appointment for another member of staff, the appointment will be displayed in your calendar but a message in the notes will tell you that you are not the one attending the appointment.
Your recently edited listings
This area displays properties that you’ve either created or edited. The details displayed are the main photo, the property reference, contract, status, price, display address, quick link to edit, if a rental a quick link to the Agreements.
To the right there are quick links to display All properties and/or All businesses.
Your recently edited contacts
This area displays the contacts that you’ve either created or edited. The details displayed are the contact Title, First and Surname and what they are (e.g. Applicant, Tenant, Landlord, Vendor, Contractor, Solicitor). To the right is a quick link to edit their details.
To the right there are quick links to display All contacts.
Today's appointments and outstanding tasks
This area displays appointments and tasks that are assigned to you. By clicking on them, you will be taken to the Diary where the item will be displayed, allowing you to view, or if required, update the details.
To the right, View diary will take you to the Diary for today. Clicking “Create a task” will allow you to create a new task.
Performance Chart
This area displays those properties that have been Let/Completed/Withdrawn over the last twelve months. An informational display to display how successful your agency has been.
Local weather
This area displays the local weather based on town/postcode information provided in your branch configuration. The data displayed will be for the current day and the next seven days. If you want to view a different area, enter a postcode or town to be displayed. This area is displayed to assist in photographing a property, blue skies promote a property far greater than wet days – not that we’re able to change the weather!

