Administration
From Standout Property Manager Wiki Help
Agency configuration
Agency
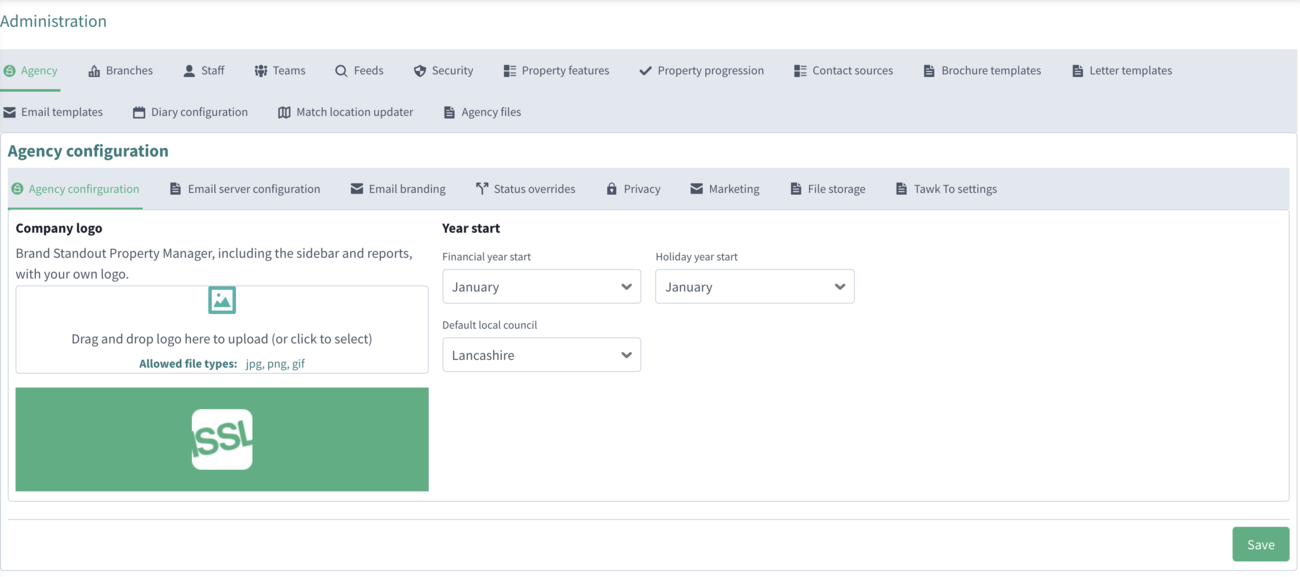
Company logo add to the system an image of your company logo for use within the Standout system
Year start
Financial year start when the Agencies financial year starts
Holiday year start when the Agencies holiday year starts
Default local council select your local council from the drop down list, you can press backspace and start typing the name to find the council name.
Email server configuration
To help with the initial configuration of your email server, a new option “Default Services” has been added.
Standout has the initial settings for email services from:Gmail / Hosted Exchange by ISSL / Office 365 / Other mail provider
The above can be ignored if your IT support has given you details to populate the email server configuration.
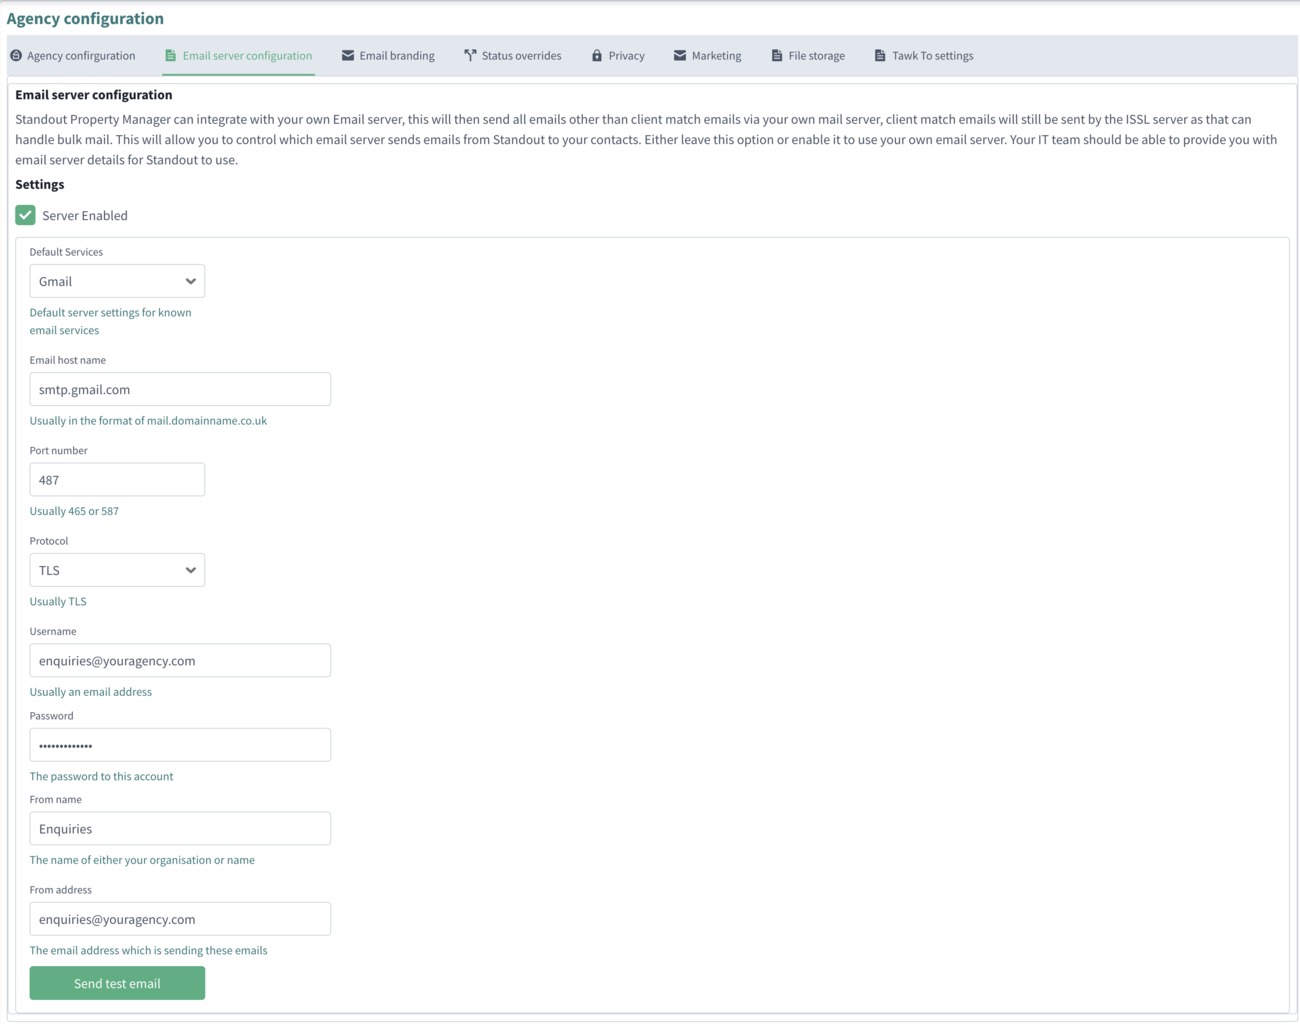
Standout Property Manager can integrate with your own Email server, this will then send all emails other than client match emails via your own mail server, client match emails will still be sent by the ISSL server as that can handle bulk mail. This will allow you to control which email server sends emails from Standout to your contacts. Either leave this option or enable it to use your own email server. Your IT team should be able to provide you with email server details for Standout to use.
The options are:
Server Enabled ticked, this will allow configuration of your own Email Server
Email host name normally the smtp address (eg smtp.yourdomain.com)
Port number normally 465 or 587 (gmail etc is 587)
Protocol Normally TLS but can be SSL or None
Username Username of the account (can be an email address)
Password Password for the account
From name Text for the account (can be your Agency Name)
From address Email address of the account
Send test email Send a test email using the above settings (saving the agency is not required for testing, only to save permanently)
Email branding
This section allows you to upload images for an email header and footer, change colour schemes and when sending a property match email, enter additional text at the top of the email.
Status Overrides
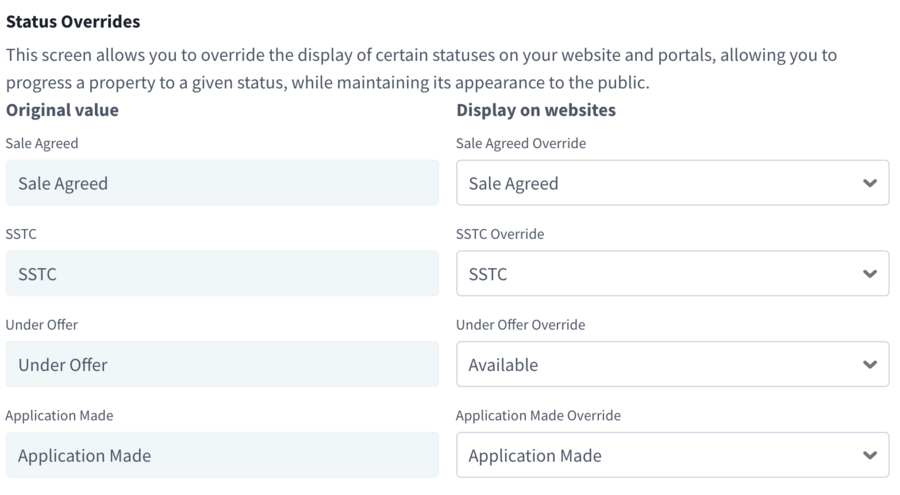
This section allows you to override a status on your website and portals. The main reason for this override is whilst a sale goes through, and has the possibility of falling though, allowing the agency to continue gathering potential customer details during the sale process.
Privacy
Configure the amount of time to keep details on the system. This screen allows you to determine how long you will keep various forms of data. This decision is yours and any periods should be updated in line with your privacy policy and company terms.
Telephone privacy statement
This statement will be displayed alongside a telephone consent checkbox on contact details, allowing it to be read out
Recently introduced, by default, “Force GDPR conformation” has been added to Standout. This option will force the Marketing/Privacy/Manual consent option to be displayed when a member of staff adds a new contact.
An agency should place their own Telephone privacy statement in the above box. This will be displayed each time a staff member creates a new contact.
However, if you are entering a Solicitor, you can instruct your staff member to ignore this option and move left to the Contact details tab and enter the Solicitor details.
Data retention limits
Vendors
Buyer
Landlords
Tenants
Staff
Marketing
MailChimp Key
To allow you to email multiple contacts, the Marketing tab allows you to link Standout to MailChimp. All the details required are linked from this page to MailChimp.
MailChimp Lists
An example of how lists are shown can be seen:
File storage
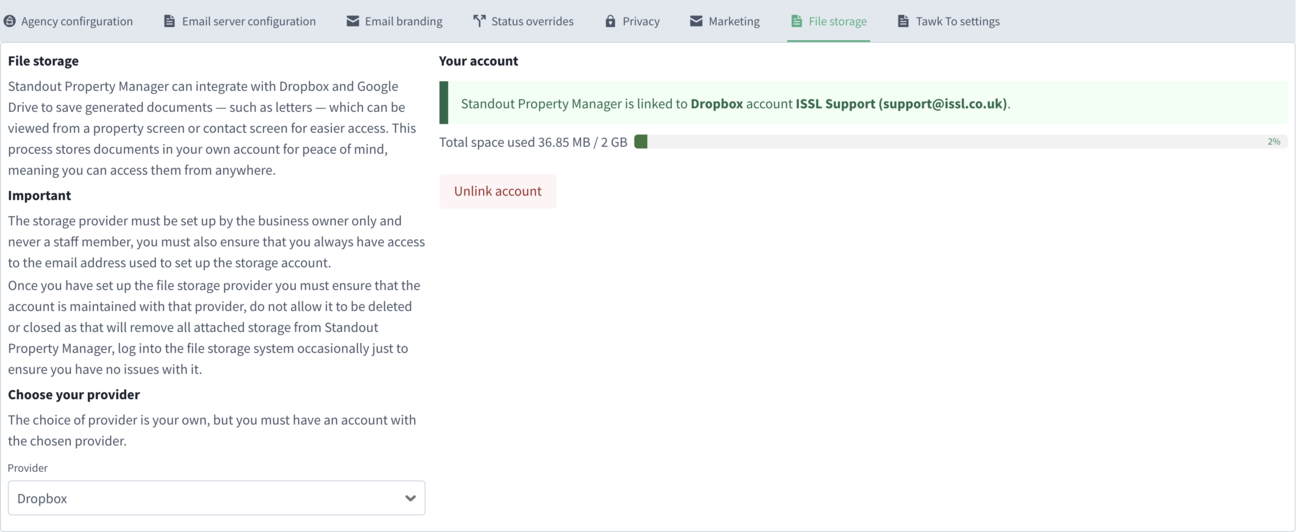
This section will require you to subscribe to either FTP File Server, Dropbox or Google Drive for the storage of documents. These documents are used in both Letter and Email templates to send agency documents to your contacts.
ISSL can offer 2Gb of free disk space, please contact us at support@issl.co.uk and we can set this up for you. Once you get to the limit, we offer cheaper rates than the other services.
The maximum size of each file you can upload is 10Mb. The maximum space is dictated by your storage provider.
Please be aware, large files connected to an email may stop the contact from receiving your email if their email provider has a limit on the size of an email.
Standout is linked to our accounting system, all invoices that have been issued to your agency can be viewed from this screen.
Tawk to API
Standout can show and link the Tawk To chat system so that if installed on your website, you can receive notifications that a client wishes to chat.
When you log into Tawk to then choose the icon on the left side which reads “Add ons”, choose Webhooks.
Click the “+Create Webhook” button and you will then need to copy the link given in the Tawk to settings and place it into “Your Request Endpoint URL” and then copy and paste the Secret Key into the Tawk To Settings, click Save to update.
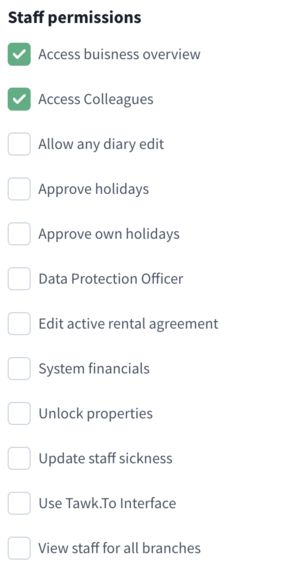
Note: You will need to amend each staff member and go to Permissions and tick the Permission “Use Tawk.To Interface” for them to be able to use Tawk to within Standout.
Branches
By default the first Branch created is called Head Office (you can rename this). When in trial or Landlord mode, only one branch can be configured. Once signed up, an agency can add further branches.
Adding a branch
To add a new branch, the procedure is identical to the details in Edit Branch,.
Edit Branch
To edit a branch, just click the Edit Branch on the right hand side.
Contact Information
Branch Name the name of this Branch
Postcode the postcode of this branch
Address the full address of the branch
Country the country where the branch resides
Telephone Number the telephone number of the branch
Fax Number the fax number of the branch
Email address the main email used for this branch
Latitude the Latitude of this branch (for digital maps)
Longitude the Longitude of this branch (for digital maps)
Set map move your branch latitude/longitude if does not display correctly
Comp. Reg. No. the Company Registration Number for your agency/branch
Legal entity name the Legal entity name of this Agency
Managers
Once you’ve added all the staff in your Agency, you can assign those Staff members to Manager roles.
Default rooms
To optimise property entry, it Is possible to create default rooms and floors. These rooms/floors will appear (if chosen to be added) at the end of your floors/rooms within a property. One of the popular options for default rooms is to add Agent Notes and Disclaimers to a property and saves the re-entering of room information. Additionally, as with floors/rooms in a property, these can be excluded from being included in a brochure.
Settings
Branch services
Branch on hold if you either close a branch or temporarily stop operating from a branch, this will place that branch on hold so no properties can be added.
Sales this branch caters for Sale properties
Rentals this branch caters for Rental properties
Auction this branch caters for Auction properties
Residential this branch caters for Residential classes
Commercial this branch caters for Commercial classes
Business sales this branch caters for Business sales
Applicable countries
Select which countries this branch deals with 'England' is selected by default.
Default local council
This dropdown selection will default to the default local council in the Agency settings. However, if this branch does not fall within this remit, you can then choose an alternative.
Properties
Property status mode this allows all properties to either operate by Free or Guided (default) modes. In Free mode, you select the Property status as you progress through either the Sale or Rental. In Guided mode, the system will allow you to only choose from a chosen set of statuses and will change as you progress through the Sale or Rental process.
Countries can be configured so that if you only operate in England, then you can choose Not displayed otherwise you can choose Displayed or Mandatory that a country is selected.
Enable EPC is when you either wish to enter an EPC for a property but, if this is not an requirement, then EPCs can be turned off.
Force money laundering checks will only allow you to proceed with a property only when those parties have supplied money laundering documentation.
Flag properties that have not been viewing in the past number of days allows you to set a number of days so that agents are aware of properties that are not gaining interest by potential buyers.
Diary
Should you wish to ensure that by default emails are sent to viewers, owners and tenants but can be either turned off here or when creating an appointment.
Fees
Default fee the fee default amount (1% default)
Default fee type either Fixed or Percentage (% default)
Default rental fee the rental fee default amount (0% default)
Default rental fee type either Fixed or Percentage (% default)
Default finders fee a monetary figure (£0.00 default)
Apply fees when the agencies management feeds should be applied
On due date when the due date occurs, fees are raised automatically
On payment when the tenant pays, then the fees are raised
Currency
An agency can set up all the agency fees that they accept, by default GBP/EUR/USD
Letters
When letters are produced, who letters are sent from, either the Property Manager, Branch Manager or that user that is logged in.
Language
Standout can convert text to French/German/Spanish instead of English
Tax
When you enter your VAT number, Standout will allow you to enter the VAT rate and the effective Date, this will allow the system to calculate the correct VAT amount for each applicable transaction. If the rate changes, then Standout will use the current VAT rate.
Rental
Rental fee information the agencies legal information regarding rental properties.
This will be displayed on your website and to portals.
Repairs If your website was created by ISSL recently, it may have the ability for tenants to report repairs directly. If this is available and enabled, the below staff member will be notified whenever a new repair is reported by a tenant, in addition to it appearing in the list of repairs for their property.
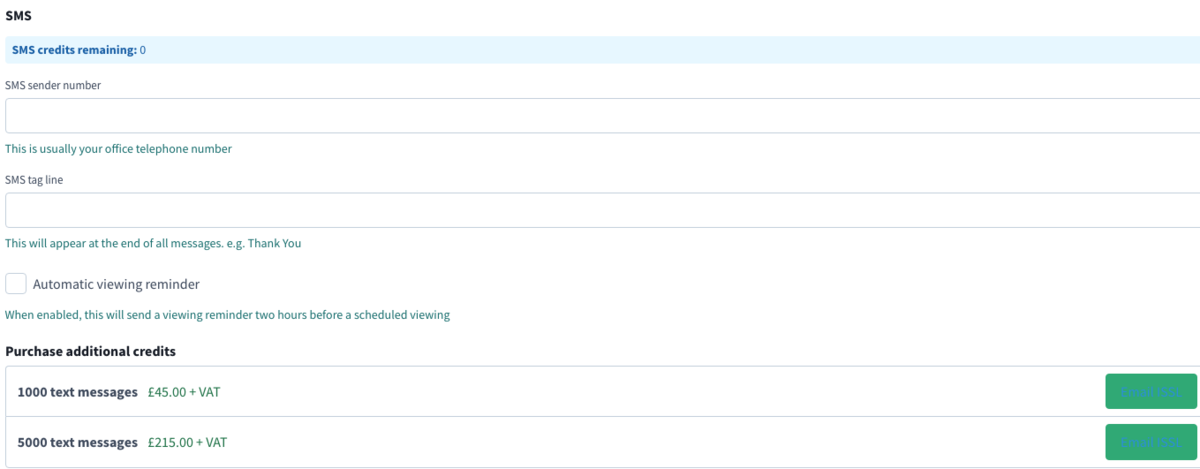
SMS
Standout has the ability to send SMS text messages to mobile numbers but, an Agency must purchase credits for this to operate. You will be required to enter an SMS sender number (usually your office number) and a tag line for the end of your message. Also, if enabled, Standout can text those contacts who are viewing a property, will receive a reminder 2 hours prior to an appointment.
Advertising board request
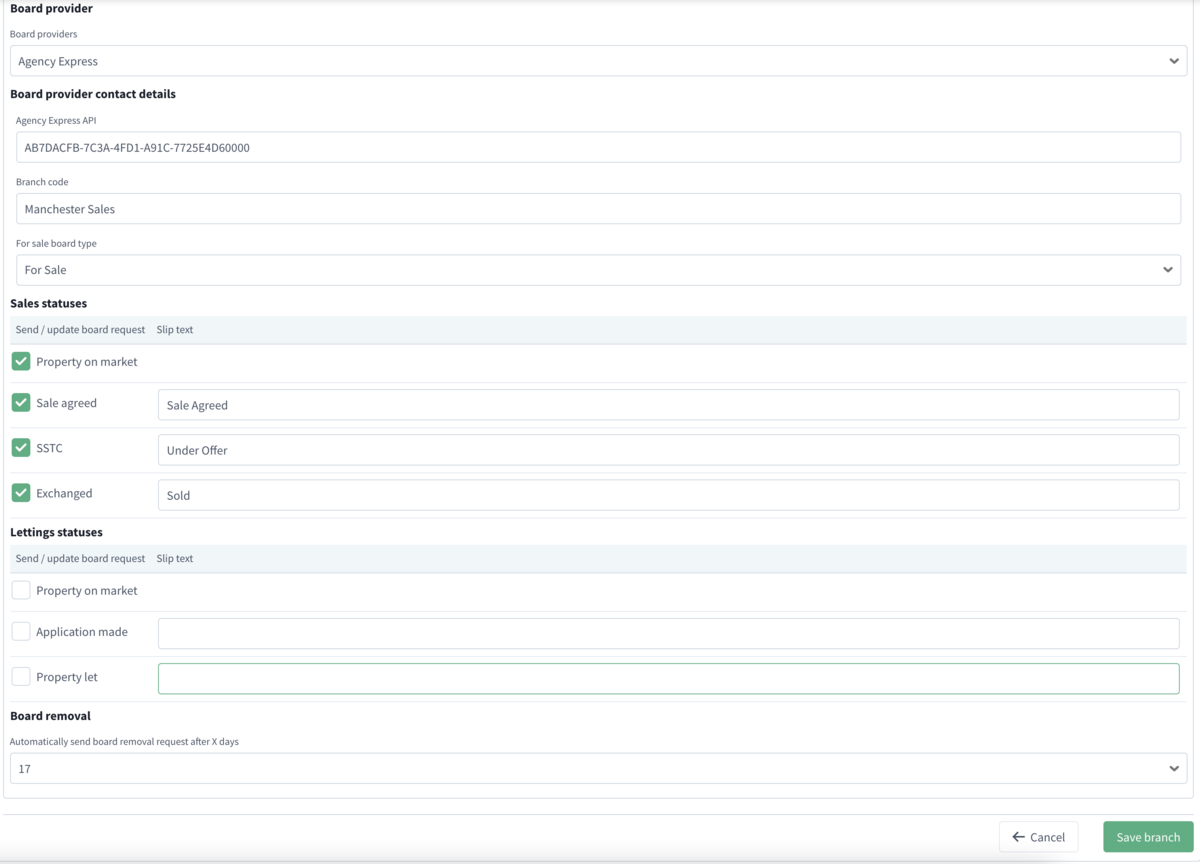
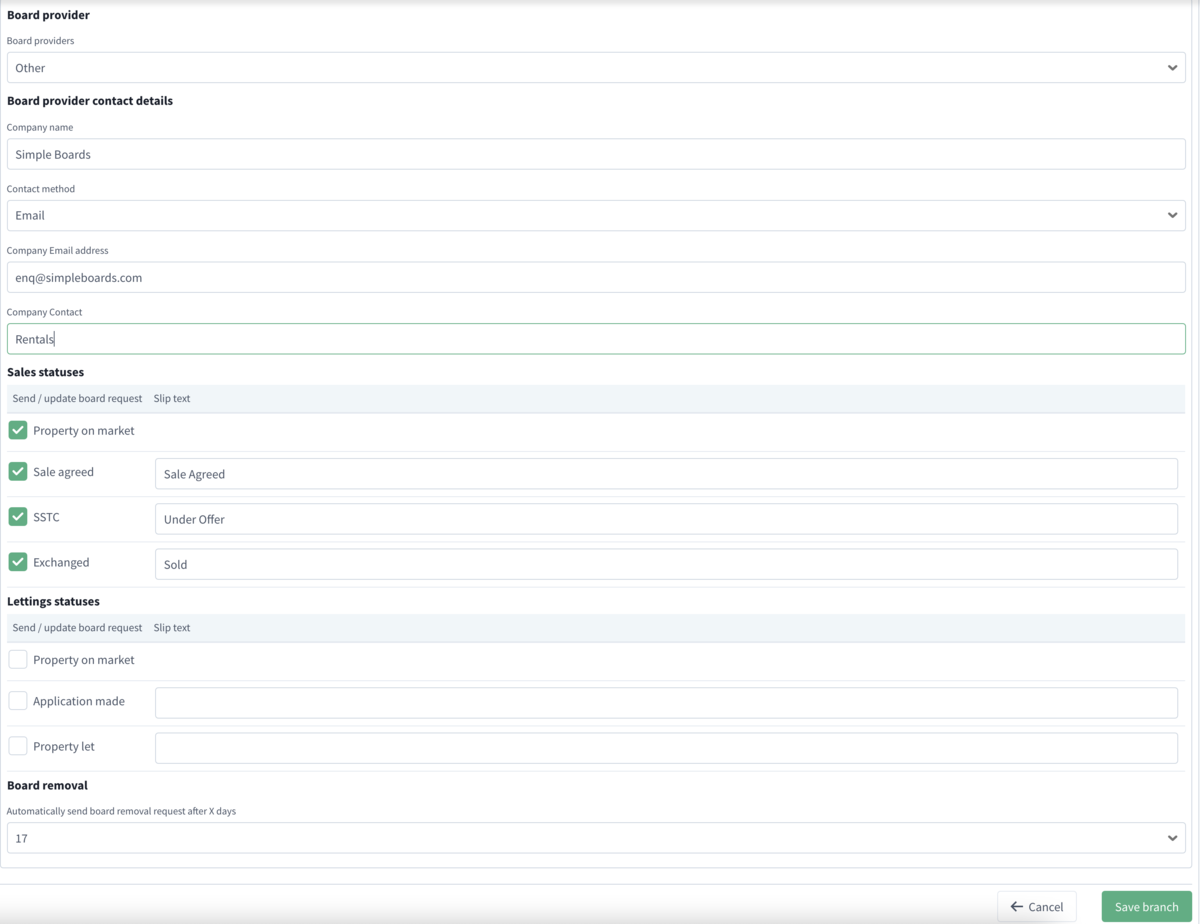
Standout has two methods for board companies, either the standard email service, or Agency Express
Agency Express
When you sign up with agency express you can obtain an API code from them, just put that (Copy and Paste) into the Agency Express API field, you will also get a Branch Code, again copy and paste that into the Branch code field and select the other options as required.
Standard Email Board Company
Board company contact details
Fill in the required information primarily the board company email address where the automated emails will be sent to.
Sale statuses
When standout sends/updates a board company regarding changes.
Letting statuses
When standout sends/updates a board company regarding changes.
Board removal
When a board should be removed (after x days).
Applicable countries
By default England is selected for all companies and offices, however you should ensure that this is selected correctly according to the countries that you sell properties in, just tick or untick as required.
Affiliates
Standout can send the appropriate information to either Brief Your Market or Move with Us should you have a subscription with either of these companies.
Proactive Actions
Proactive actions have been created to automate actions to improve efficiency of your agency. By setting up actions you are able to initiate reminders, communications with a property vendor or landlord without having to manually perform this. For example, you might want to send an email to a vendor after 7 days of their property going on the market to reassure them you're doing everything to find a buyer.
Creating a new action
Description - A description of the action (max 255 characters)
Enable/Disable - If this task is Disabled, it will not be processed by Standout (if you want to suspend this for the time being)
Property Class
Residential/Commercial/Business - Choose which class of property to perform the action against
Property Type
Sales/Lettings - Choose if this action is to perform against a sales property or a rental property
Property Status
At status change/After status change - "At status change" will be processed every time a property is edited and those actions which are applicable, will be processed. "After status change" will be processed by a daily job that will run in the early hours of a morning. Therefore, when selecting a "Contact day" you will NOT be able to choose "Immediately".
Specific status - Which status do you want to perform the action against
Contact Method
6 methods are currently available: 'Create a task', 'Diarise telephone call', 'Diarise send email', 'Diarise send SMS', 'Email (automated)', 'Email (staff member)', 'SMS (automated)'
Contact day
You can choose to perform this action immediately or up to 28 days in the future. Note: Immediately will NOT be available if "After status change" is chosen.
Contact time
You can choose a specific time for the diary appointment to be created.
Staff member
Choose who to assign any the action to (be it an task/appointment or a signature on an email.
Send to
Choose who to send the email or SMS to - Vendor/Landlord or Buyer/Tenant
Task name
Enter a meaningful task subject line when creating a task for a staff member (max 255 characters)
Subject
When an email method is chosen, this appears for you to complete.
Body
The main text to an email. Variables can also be used and are:-
Current variables are
Property variables
{RE} - The Display Address for the property
{REF} - The property reference
{ADDRESS} - The properties full address (seperate lines)
Vendor variables
{VendorSalutation} - The vendor name including Title
{VendorTitle} - The title of the vendor
{VendorName} - The first name(s) of the vendor
{VendorSurname} - The surname of the vendor
{VendorTelephone} - The vendors telephone number
{VendorMobile} - The vendors mobile telephone number
{VendorEmail} - The vendors email address
Landlord Variables
{LandlordSalutation} - The landlords name including Title
{LandlordTitle} - The title of the landlord
{LandlordName} - The first name(s) of the landlord
{LandlordSurname} - The surname of the landlord
{LandlordTelephone} - The landlords telelphone number
{LandlordMobile} - The landlords mobile number
{LandlordEmail} - The landlords email address
Buyer variables
{BuyerSalutation} - The buyer name including Title
{BuyerTitle} - The title of the buyer
{BuyerName} - The first name(s) of the buyer
{BuyerSurname} - The surname of the buyer
{BuyerTelephone} - The buyers telephone number
{BuyerMobile} - The buyers mobile telephone number
{BuyerEmail} - The tenants email address
Tenant variables
{TenantSalutation} - The tenant name including Title
{TenantTitle} - The title of the tenant
{TenantName} - The first name(s) of the tenant
{TenantSurname} - The surname of the tenant
{TenantTelephone} - The tenants telephone number
{TenantMobile} - The tenants mobile telephone number
{TenantEmail} - The tenants email address
Staff variables
{StaffMember} - The name of the staff member dealing with this property
{AgencyName} - The agency name
{OfficeAddres} - The address of the branch
{OfficeTelephone} - The telephone number of the branch
{OfficeEmail} - The email address of the branch
Formatting variables
{b} - Start to bold text
{/b} - End of the bold text
{u} - Start to underline text
{/u} - End of the underline text
{i} - Start to italic text
{/i} - End of the italic text
Delete action - allows for you to delete the action
Cancel - cancel editing the action
Create/Update action - creates or updates the action
Once saved, you will be shown a list of existing actions. You have the options to edit or delete an action.
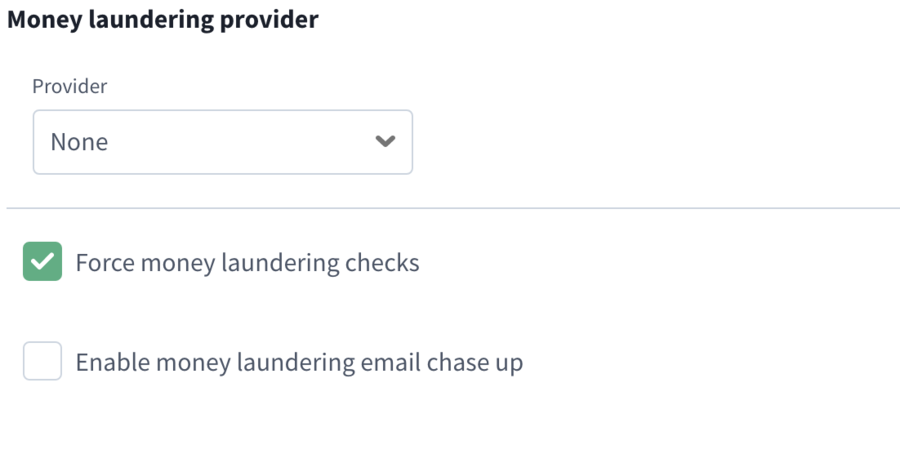
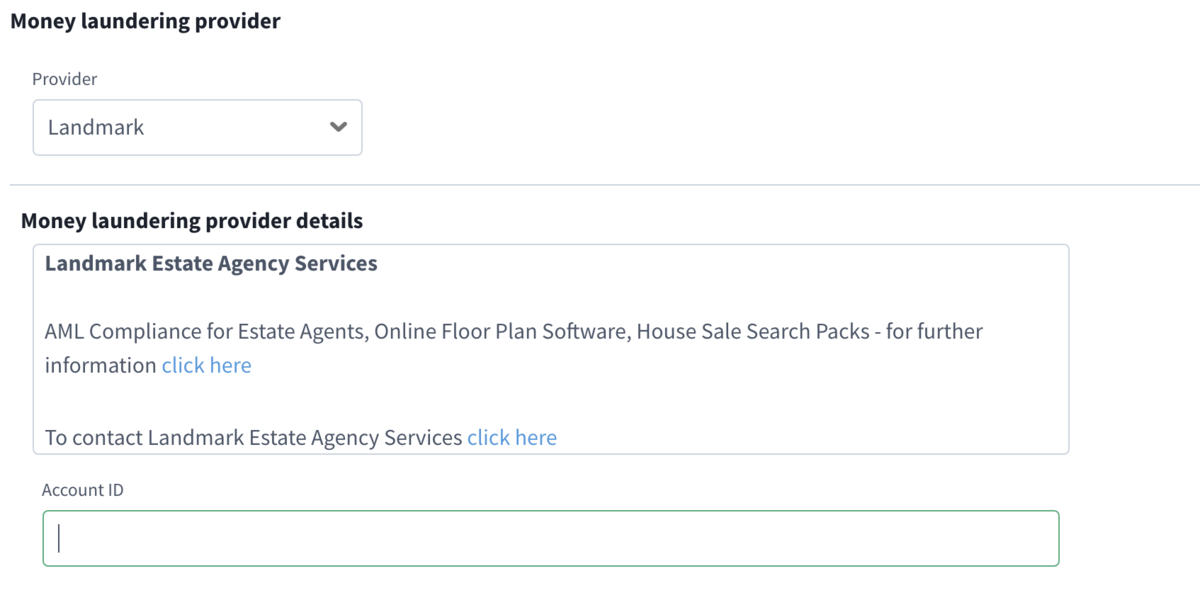
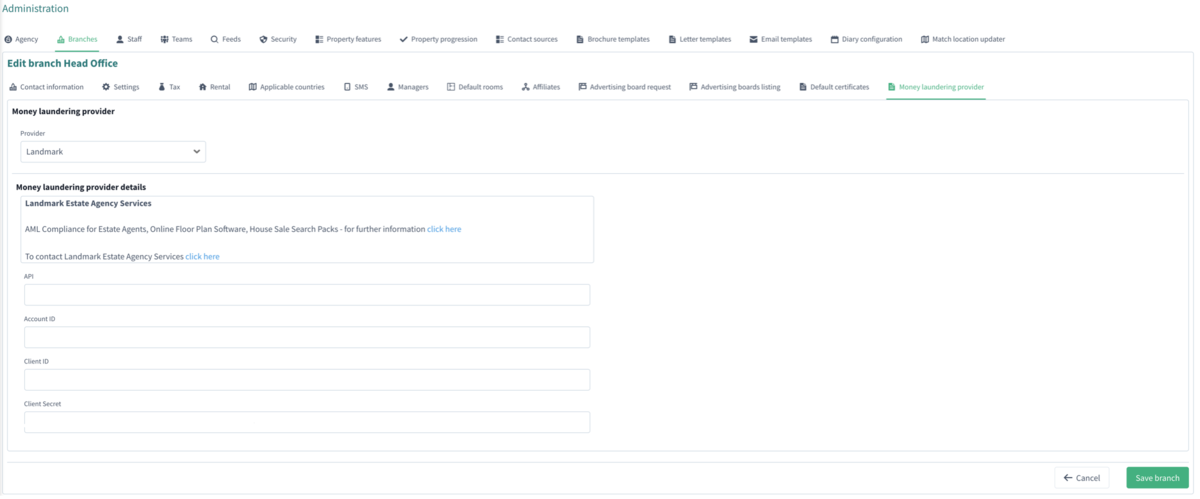
Money laundering provider
There are 2 options for money laundering provider either none (you will do all the checks manually yourself) or Landmark where they will do all the checking for you.
If None is selected you have two options available Force money laundering checks, which basically reminds you if you have not entered any identity check information and email chase up, enabling this option will send reminder emails to those contacts that are still required to provide you with Money Laundering documentation. By enabling this option, a staff member is required to be selected and if required, the email can be amended to your own wording.
Landmark AML
Selecting Landmark will enable the fully automated Anti Money Laundering verification system from Landmark.
Once you sign up with Landmark tell them you are using Standout Property Manager From ISSL they will provide you with an Account ID, copy and past that into the Account ID field and save, from that point on your are able to automatically AML check contacts.
Staff
By default the staff list shows all staff that are enabled, you can change this list to show all inactive staff by clicking on the filter by status drop down, from here you can select active or inactive staff.
Should you want to restore a staff member that you have made inactive swap to the inactive list, then click restore to the right of the person that you want to make active again.
It is important that if a member of staff leaves you deactivate them from the system as soon as they walk out the door for the protection of your data, as they can login from anywhere unless you have ip restrictions in place.
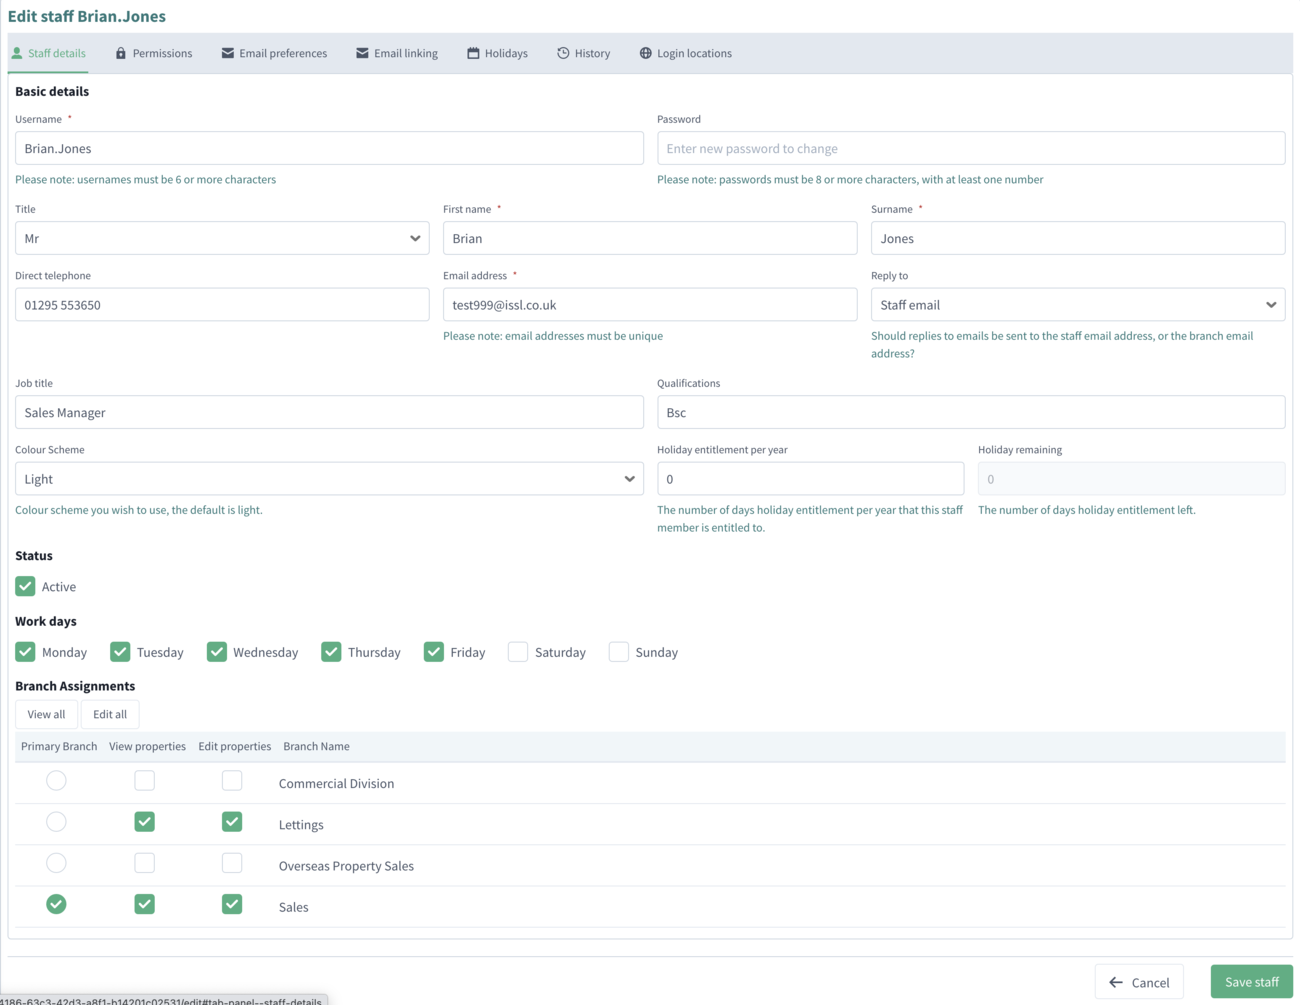
Add / Edit a member of staff
Most fields here are self explanatory please remember if you have multiple offices to assign the staff member to the correct office with the correct privileges .Once completed data entry of this tab, please press Create staff before moving to the next tab to ensure that there will be no data loss or entry errors.
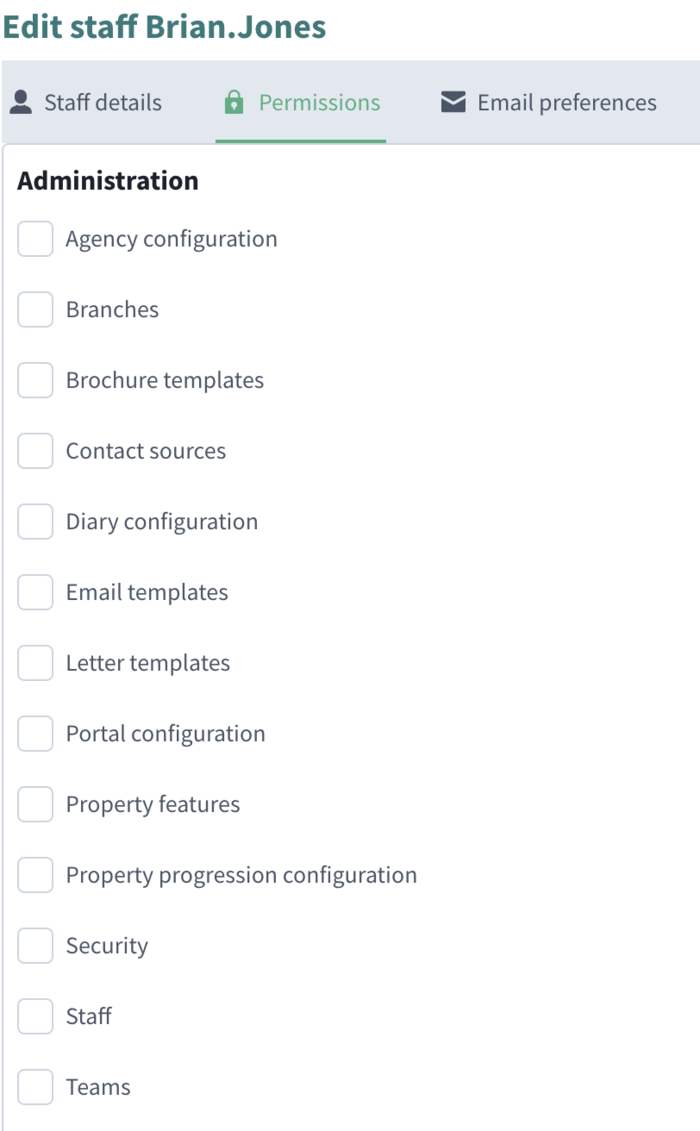
Permissions
You can allow or disallow staff access to parts of the Standout system.
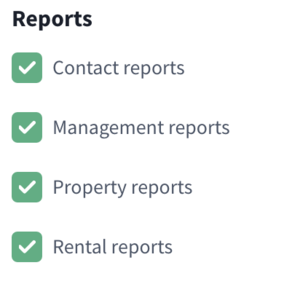
The permissions screen is split into logical sections to help you assign the correct level of access to each person.
When you click any of the above options, they will automatically update, therefore, you do not need to click Save staff on this tab once you have completed your edits.
Email Preferences
Use this section to create an email signature for automated emails as you are legally obliged to do this.
Email access
Entering a staff’s email settings allows Standout Property Manager to automatically process emails from portals such as Rightmove and Zoopla, as well as keep a history of communication with known clients.
History
Shows a history of what a staff member has had logged whilst using Standout.
Login locations
When staff log in, their IP address is recorded, if a member of staff is working out of the office and shouldn’t be, this will allow you to block the address in Agency / Security.
Staff Holidays Administration Configuration
Configuring holidays is simple, there are the following two options in Administration/Staff/Staff member. Then, select the Permissions tab
Specifically, these are the two settings that need to be configured, with ticks, that member of staff can do both, without those, are required to request holidays.
Configuration Warning
If no one has “Approve own holidays” in a branch, when a staff member attempts to Request a holiday, they will see this error:
To fix this issue ensure the above has been configured.
Staff Configuration
Within Staff details / Basic details, there is now the ability to store the staff members holiday allocation, this is in number of days.
Along with their allocation, please enter their workdays so the system knows which days they work.
Teams
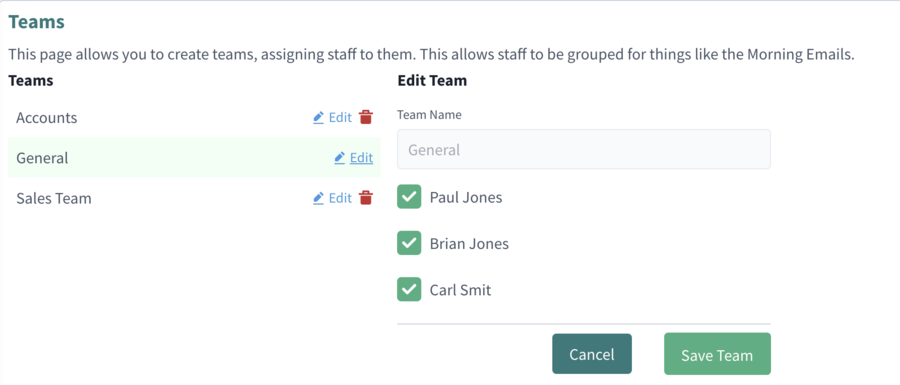
The above example screen shot shows the general team selected and all staff members are added to that team. By default, the General team is created and all staff members automatically get added to this team when they are created.
To edit a team click Edit then add or remove staff as required and click Save team.
To create a new team, enter the Team name, choose Staff and click Save team.
Feeds
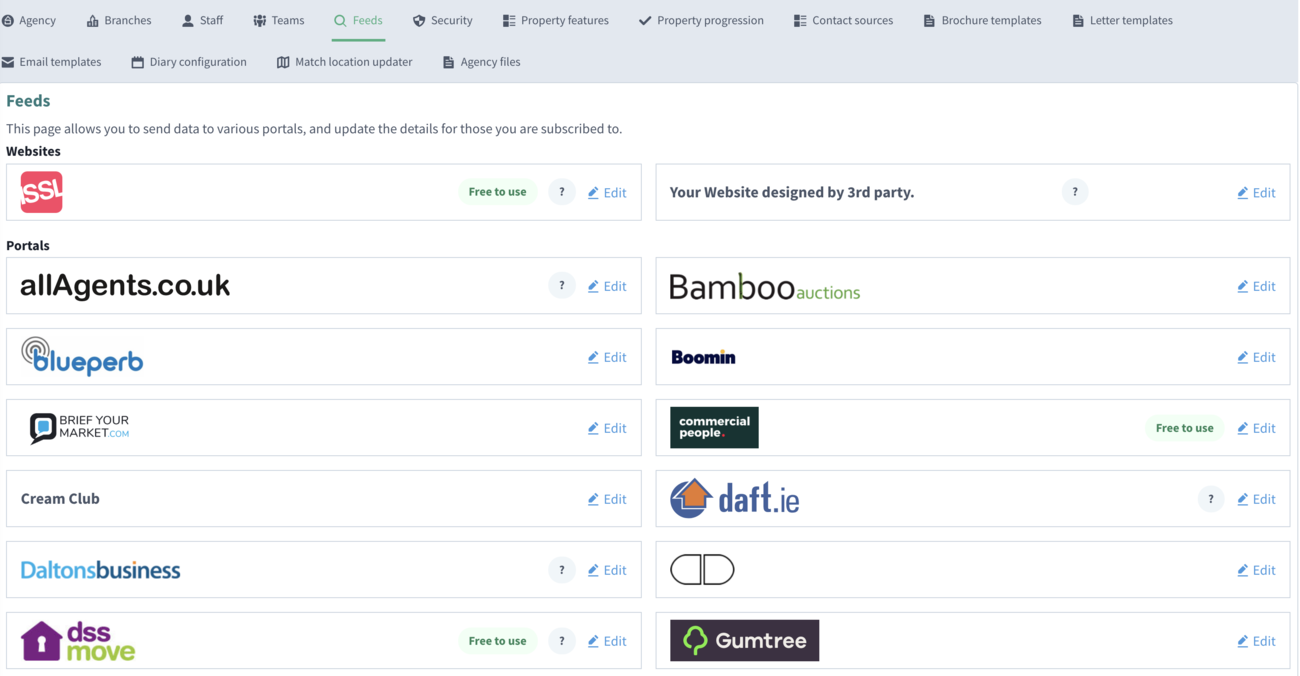
This page allows you to send data to various outbound data feeds to portals etc, and update the details for those you are subscribed to.
Editing Feeds
There are two types of outbound data feed :-
Standard Feeds (Rightmove, On the Market, Zoopla etc) and None Standard feeds none standard feeds need extra information.
All feeds are edited by simply clicking on the Edit button as per the below example :-
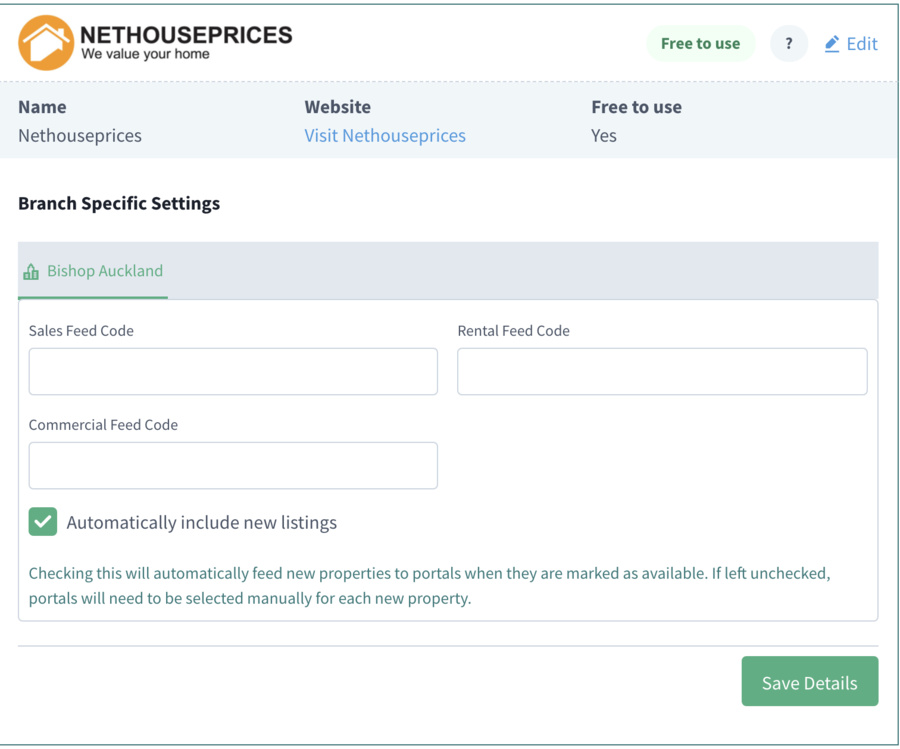
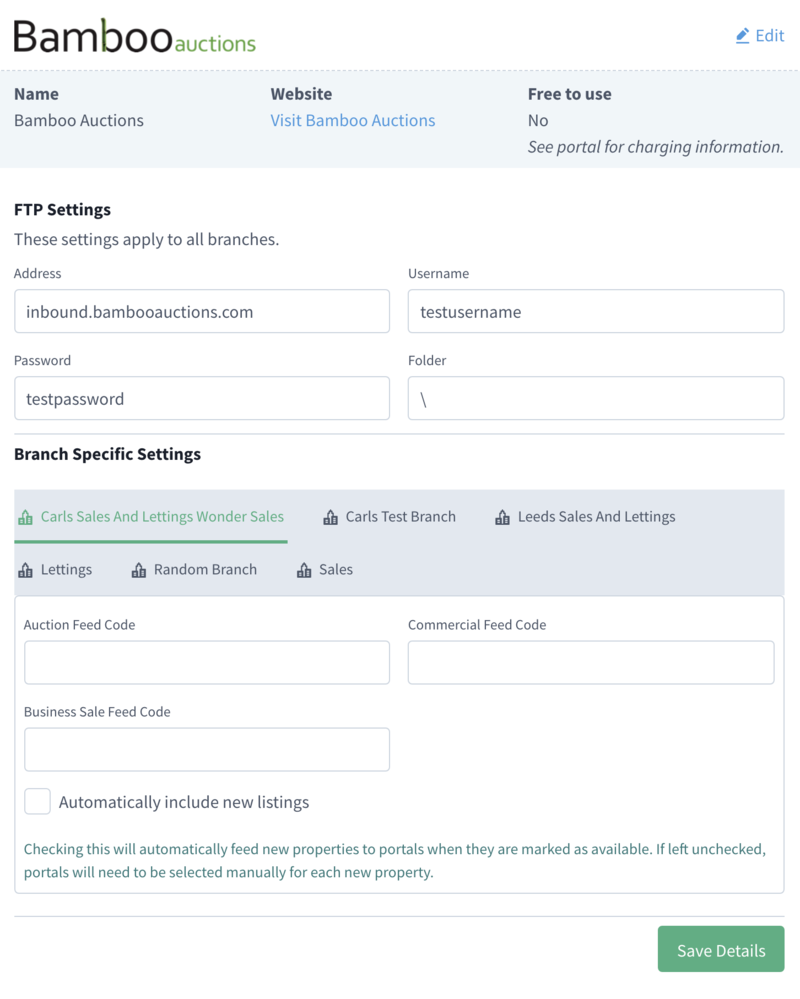
Once the Edit link is pressed it expands down to show the below :-
Just fill in the feed codes supplied by the portal company in the spaces provided, note you may have different codes for each type of property, also some types may not appear ie if you do not do commercial property then that option will not be available.
The Automatically include new listings determines if any new property you enter is automatically sent to the portal, if not selected you need to manually enable the property to send on the advertising tab within each property.
Once you have input the code supplied, press Save Details and you are finished.
The feed will automatically start.
The second type of feed requiring more information is shown below, again the portal will supply the extra information.
Portal companies will supply you with their feed information, certain portals will require FTP details to be entered, others will already contain FTP settings, some using real time data feeds (Rightmove, Zoopla etc) do not need this information. Some portals will also have separate feed codes for each branch so ensure you check that the feeds are set up correctly as per the portal requirements.
All portals will have feed codes for the types of properties that will be required to populate the above fields.
Security
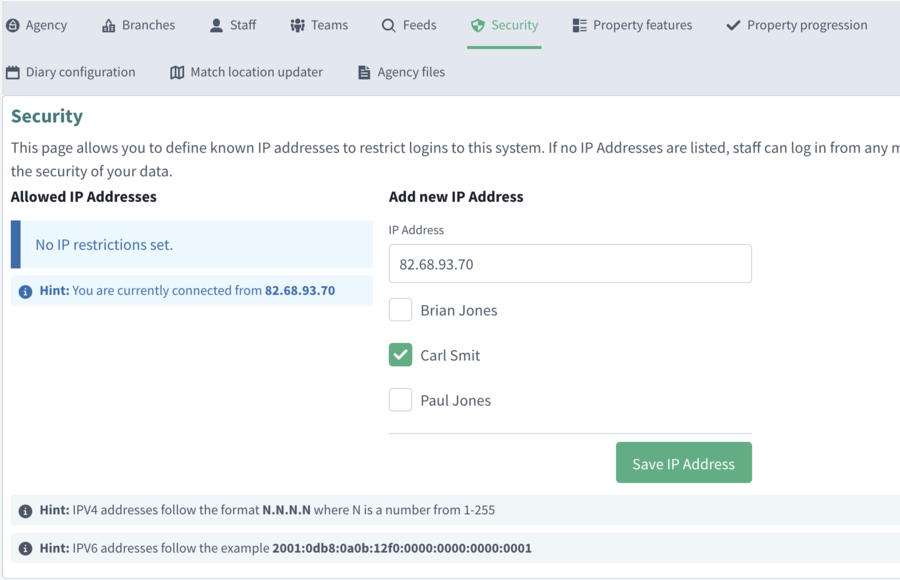
This page allows you to define known IP addresses to restrict logins to this system. If no IP Addresses are listed, staff can log in from any machine. Adding IP Addresses to this list will restrict where staff can log in from, and increase the security of your data.
The above screenshot shows that Carl Smit is only allowed to access Standout Property Manager from the ip address shown, this restricting this person to only login from the office (or any known location)
IP formatting:
IPV4 addresses follow the format N.N.N.N where N is a number from 1-255
IPV6 addresses follow the example 2001:0db8:0a0b:12f0:0000:0000:0000:0001
Property features
This option is used to add new items that have not been defined in the “Features” list within Properties.
For example if you sell properties that quite often have canal at the rear of the garden then you could add a feature of 'Canal Mooring'
Property Progression
Add marker
This allows you to add a progression marker that does not already exist and for a range of contracts/classes and contacts.
Default Residential Sales
Default Residential Lettings
Default Commercial Sales
Default Commercial Lettings
Default Business Sales
Contact Sources
Standout has some default advertising sources configured. However, should you wish to record a specific advertising campaign or advertising outlet not listed, it can be added in this section.
Brochure Templates
By default, Standout has two brochures available. However, these can be amended for your agency. ISSL offer a service to create a brochure for your agency (at a cost), otherwise, you may download a template, amend it and upload it.
To create a new brochure, click Duplicate on either of the above defaults.
Editing a brochure
Document name a meaning full short description of the brochure
Document description a full description of the brochure
For a complete list of what variables to use within your brochure, click “Template variables available to use on this brochure” and a comprehensive list and descriptions will be show. If needed, copy/paste this information into a new Word document to either save as a reference and/or print out.
Click “Download Microsoft Word template” to download and edit the document. When completed, click on Choose File, select the template that you’ve edited and then click
Save Brochure. The original brochure will now be replaced with the new version. To test, open a property, click More Actions then Generate Brochure, if you then save the property with a generated brochure, Standout will create a PDF version.
Letter templates
Standout offers a master set of letters when communicating with contacts. Every letter can be duplicated, amended and then used by Staff. We recommend letter names that are meaningful and not ambiguous, especially if duplicate letters are created with only minor differences.
When you’ve attached Agency files to be sent with your letters, the number of letters attached will be shown in the letter description “(and has ‘x’ agency file(s) attached)”.
Master letters are available to preview and Duplicate but not Edit.
Choose a letter to that you wish to duplicate and click “Duplicate”
Edit letter
Copy settings
If you have a document already configured (with Page/Header/Footer settings, you can use this option to copy these. Click Copy settings from, select your letter and then click Copy.
Enter a meaningful Letter name and description for this letter.
Page
These settings allow you to control the margins on the page and the default font size to be used.
Header
This section allows you to configure where a logo will appear an on what page.
This section allows you to configure where a logo will appear an on what page.
Letter content
This section will let you configure the content of the letter and place the variables in your letter which will be converted.
Design Help
If you click on the “Help on designing letter templates” a list of sections and variables should be displayed
The above is broken into three sections - Section variables, Mandatory variables, Optional variables (usually added variables).
Agency files
Once files have been uploaded in the Agency files section, you are able to then choose files to be sent with these letters, should you choose the Email option and are attached automatically.
Once completed click on Save letter to save these changes and return to the Letters list.
Email templates
As with Letters, emails have Master copies that you are unable to edit, to make your own version, click “Duplicate” to create a new document.
Editing Email
Click on Edit on the right hand side to open the template details
Document name the name of the email
Document description a detailed description of the email
Template Code the wording of your email
Show merge fields
Agency files the files that can be attached to an email sent from Standout
Delete Delete this template
Cancel Cancel any alterations and return to the email templates
Save email Save the email and return to the email templates
Diary categories
This section allows you to create new categories for the diary and also allows the category colour to use.
Match location updater
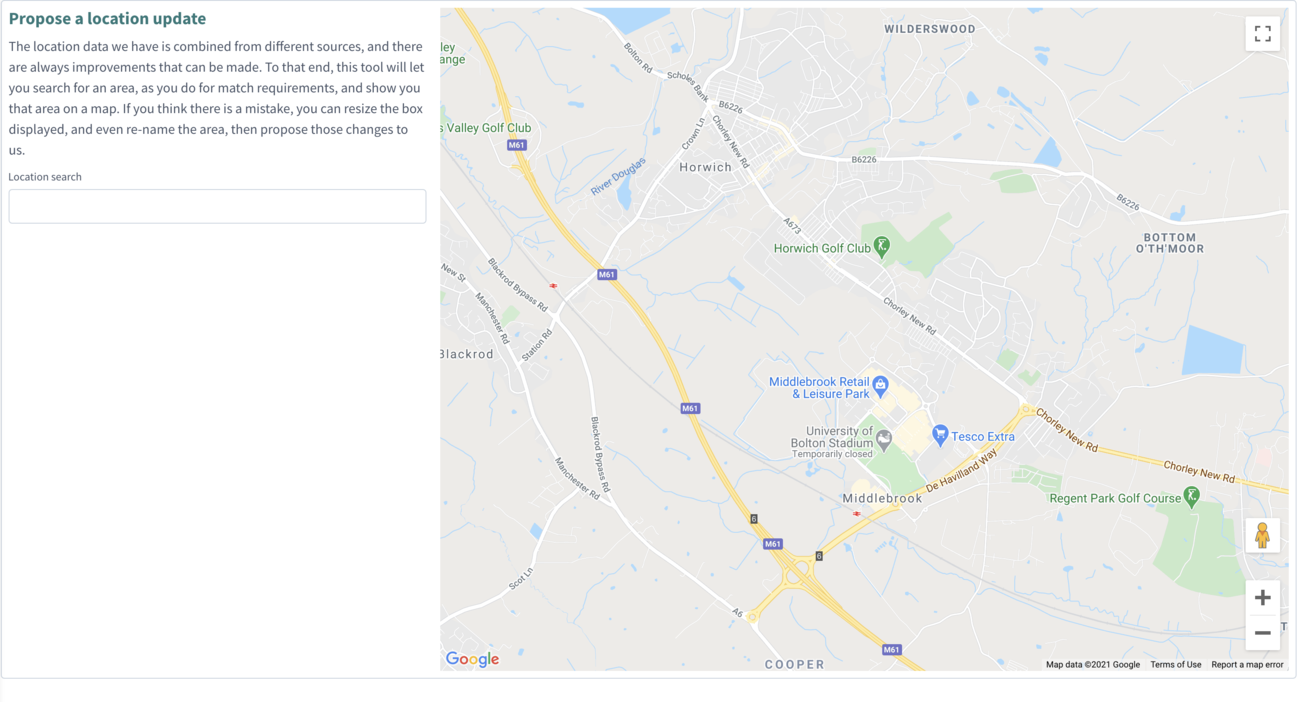
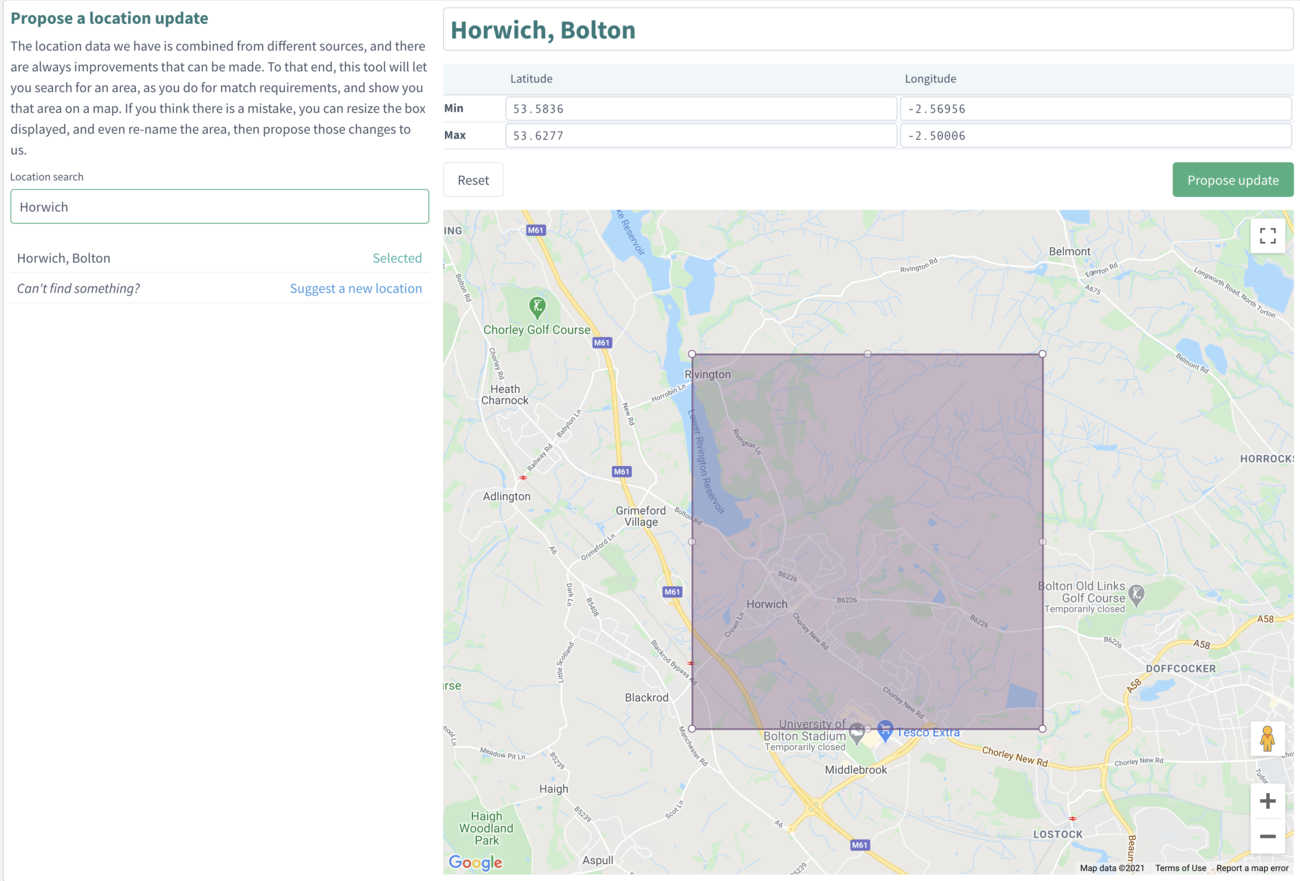
The section allows you to enter an area, then, if you believe it should be altered, you can then send a request to our support team for it to be inspected and either authorised or rejected.
Proposing a new location
Nearby location if the location can’t be found, enter one that is nearby as a starting point and then amend as required.
Name your location Name the location of the area you are suggesting
Propose location click this button to send the location to support for their review.
Landmark Agency Configuration
Landmark should provide you with four configuration keys, these are to be stored in Administration / Branch / Money laundering configuration
You need to input the following:
API or Ocp Apim Subscription Key
Account ID
Client ID
Client Secret
Once entered (or copy/pasted), then save the branch.
You will need to log out and log back into Standout for these settings to allow AML checking.

