Difference between revisions of "Standout - Quick Start"
From Standout Property Manager Wiki Help
Paul.Spann (talk | contribs) |
Carl.Ogden (talk | contribs) |
||
| (13 intermediate revisions by 2 users not shown) | |||
| Line 12: | Line 12: | ||
You should be presented with the systems login page, which looks like: | You should be presented with the systems login page, which looks like: | ||
[[File:Login Form.png|none|thumb|587x587px]] | |||
The above is a | The above is a snippet from the login page, to proceed you’ll need to know the Client ID which is the same for all users in your company and your individual Username, every user in Standout Property Manager must use their own Username and should never share passwords. | ||
If you’ve forgotten your password, you can click on the wording “click here” to then reset your password. | If you’ve forgotten your password, you can click on the wording “click here” to then reset your password. | ||
| Line 20: | Line 21: | ||
Click Continue. | Click Continue. | ||
[[File:Login Password.png|none|thumb|500x500px]] | |||
Enter your password and then click Log in. | Enter your password and then click Log in. | ||
| Line 25: | Line 27: | ||
==2<sup>nd</sup> Factor Authentication== | ==2<sup>nd</sup> Factor Authentication== | ||
If 2nd factor authentication is enabled on your account you will need to enter the 6-digit code to proceed, you will need your smart phone at this point. 2<sup>nd</sup> Factor Authentication is an advanced security system that prevents access to your account unless you have the time | If 2nd factor authentication is enabled on your account you will need to enter the 6-digit code to proceed, you will need your smart phone at this point. 2<sup>nd</sup> Factor Authentication is an advanced security system that prevents access to your account unless you have the time limited code. | ||
Google Authenticator is available in both Google Play Store and Apple App Store. | |||
2nd factor authentication is enabled in your [[Profile Configuration]] | |||
=Dashboard | == Office 365 Login == | ||
Standout can now link appointments created in Standout in your Office 365 Calendar. Click Login to Office 365 button, you will initially enter your password and if successful, you will be re-directed back to Dashboard and be informed all appointments created, edited or deleted will also replicate to your Outlook Calendar. If you create an appointment for a colleague, it will show in your Outlook calendar and inform you that you are not required to attend (such as a valuation or viewing). If you wish to disconnect Standout from Office 365, click the Logout of Office 365 button. When you next log in, Standout will look at all your future appointments and if not replicated to your Outlook calendar, Standout will replicate them. | |||
The | =Dashboard= | ||
[[File:New Dashboard.png|alt=|thumb|1300x1300px|none]] | |||
The [[The Dashboard|Dashboard]] is the default screen and where will come back to. There are six parts to this screen. | |||
Dashboard options run down the left side | Dashboard options run down the left side | ||
Status Bar – runs across the top | Status Bar – runs across the top | ||
Office 365 - a new button near the top left of the screen will allow you to link Standout to Office 365. Appointments created in Standout when you are logged in, will automatically be created (or updated) in your Outlook Calendar. Please note: do NOT edit appointments created by Standout in Outlook, always edit in Standout so that these appointments are automatically updated in Outlook Calendar. | |||
==Dashboard quick views== | ==Dashboard quick views== | ||
| Line 52: | Line 59: | ||
This will show you all the properties that have a status of Sales Completed / Rentals Let / Withdrawn | This will show you all the properties that have a status of Sales Completed / Rentals Let / Withdrawn | ||
[[File:Performance.png|none|thumb|600x600px]] | |||
===Local weather=== | ===Local weather=== | ||
This will show a 7 day weather forecast at your office town. You can then change this for a postcode or town of your choice. This has been added to allow you to check the weather when photographing a property and choose the potential best day for outside photographs. | This will show a 7 day weather forecast at your office town. You can then change this for a postcode or town of your choice. This has been added to allow you to check the weather when photographing a property and choose the potential best day for outside photographs. | ||
[[File:Weather.png|none|thumb|900x900px]] | |||
==Dashboard options== | ==Dashboard options== | ||
Tawk to integrated web chat client Tawk To – allows agents to chat | Tawk to integrated web chat client Tawk To – allows agents to chat with website users visiting your website (when implemented) | ||
Diary an internal diary to store all appointments and diarised items | Diary an internal diary to store all appointments and diarised items | ||
| Line 97: | Line 104: | ||
Hot contacts those contacts that you deem to be a hot contact | Hot contacts those contacts that you deem to be a hot contact | ||
Reports various reports that extract data from the system to either | Reports various reports that extract data from the system to either Spreadsheet or PDF. | ||
Holiday Requests those users that are able to approve or deny holiday requests will | Holiday Requests those users that are able to approve or deny holiday requests will | ||
| Line 105: | Line 110: | ||
See this option appear once staff members place a holiday request. | See this option appear once staff members place a holiday request. | ||
Administration all the administration options to configure your agency, branches, | Administration all the administration options to configure your agency, branches, staff and various other options | ||
==Status bar== | ==Status bar== | ||
Version the systems version number, by clicking this option, shows you all the | Version the systems version number, by clicking this option, shows you all the versions and improvements. | ||
Notifications a quick view of all the system notifications, including diary appointments. | |||
Page help throughout the system, clicking this should show help information regarding the section that you’re working on. | |||
Page help throughout the system, clicking this should show help information | |||
Colleagues shows colleagues that are logged onto the system | Colleagues shows colleagues that are logged onto the system | ||
| Line 129: | Line 126: | ||
Log Out when you finish using the system, then log out for security | Log Out when you finish using the system, then log out for security | ||
Sticky Notes create a post-it note type note on your desktop for reminders etc | Sticky Notes create a post-it note type note on your desktop for reminders etc You can also create and store sticky notes in contacts and properties Within the notes tab. | ||
==Business overview== | ==Business overview== | ||
The Business Overview contains useful information at a glance, such as how many new | The Business Overview contains useful information at a glance, such as how many new clients have been entered this week, whether feedback has been received and relayed to vendors, and whether there are any contacts with bounced emails (which is where an email sent by Stand Out Property Manager has been rejected, which is likely due to an invalid email address). | ||
clients have been entered this week, whether feedback has been received and relayed to | |||
vendors, and whether there are any contacts with bounced emails (which is where an email | |||
sent by Stand Out Property Manager has been rejected, which is likely due to an invalid email address). | |||
Examples are | Examples are | ||
| Line 177: | Line 164: | ||
As versions are implemented regularly (usually monthly), we do recommend that you read the release notes. The version will flash until you click on it but is important to view this information as if you have recommended a system change or improvement, will let you know what has been released. | As versions are implemented regularly (usually monthly), we do recommend that you read the release notes. The version will flash until you click on it but is important to view this information as if you have recommended a system change or improvement, will let you know what has been released. | ||
===Notifications=== | ===Notifications=== | ||
[[File:Notification Window.png|thumb|alt=|none]] | |||
When you have notifications a “pill” will appear with the number of notifications, if you wish to delete them, simply hover over it and click on the x for it to be permanently deleted. | When you have notifications a “pill” will appear with the number of notifications, if you wish to delete them, simply hover over it and click on the x for it to be permanently deleted. | ||
===Page Help === | ===Page Help === | ||
[[File:PageHelp.png|none|thumb]] | |||
Throughout Standout, each page has its own page help to assist with you when completing the entries on that page. | Throughout Standout, each page has its own page help to assist with you when completing the entries on that page. | ||
===Colleagues – sending quick messages=== | ===Colleagues – sending quick messages=== | ||
[[File:Picture 2.png|none|thumb]] | |||
Standout has the ability to send notes to other members of your branch, by clicking on the staff member you will see: | Standout has the ability to send notes to other members of your branch, by clicking on the staff member you will see: | ||
| Line 192: | Line 179: | ||
| Receiving a note: | | Receiving a note: | ||
|- | |- | ||
| | |[[File:Send Note.png|thumb]] | ||
| | |[[File:Receive Note.png|thumb]] | ||
|} | |} | ||
=Getting Started with your Clients = | =Getting Started with your Clients = | ||
| Line 207: | Line 194: | ||
Renting a Property | Renting a Property | ||
==Selling a Property (Vendor)== | ==Selling a Property (Vendor)== | ||
| Line 270: | Line 251: | ||
No – client only uses you to obtain a tenant | No – client only uses you to obtain a tenant | ||
Rent collection – you collect the rent on behalf of the | Rent collection – you collect the rent on behalf of the Landlord | ||
Landlord | |||
Yes – you look after the property on behalf of the Landlord and are responsible for all agreed arrangement. | Yes – you look after the property on behalf of the Landlord and are responsible for all agreed arrangement. | ||
| Line 308: | Line 287: | ||
Finialise the Letting (Let) | Finialise the Letting (Let) | ||
Use Bulk Payments or the Financials Tab within a Property/Rental | Use Bulk Payments or the Financials Tab within a Property/Rental Agreement | ||
Agreement | |||
==Additional Contacts== | ==Additional Contacts== | ||
Latest revision as of 15:43, 30 November 2021
Accessing Standout Property Manager
To access Standout Property Manager, it’s best to use an up to date web browser. We suggest Chrome, but all modern browsers should work without issue. However, we do not recommend older Internet Explorer browsers as this application can be problematic.
Enter the following URL to gain access to Standout Property Manager:
https://www.standoutpropertymanager.co.uk/login
We would suggest bookmarking the above link in your browser for easy access.
Logging into Standout Property Manager
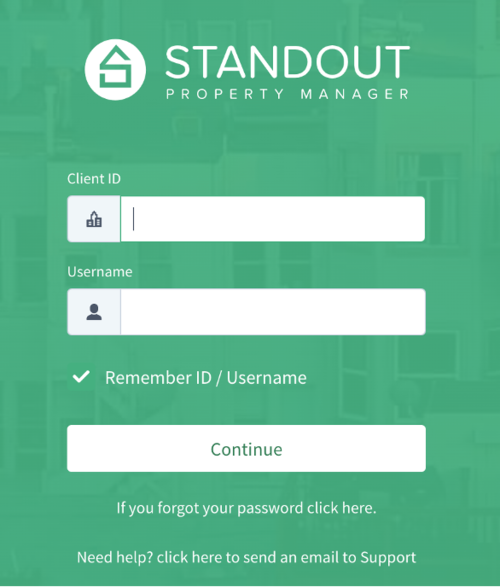
You should be presented with the systems login page, which looks like:
The above is a snippet from the login page, to proceed you’ll need to know the Client ID which is the same for all users in your company and your individual Username, every user in Standout Property Manager must use their own Username and should never share passwords.
If you’ve forgotten your password, you can click on the wording “click here” to then reset your password.
Whilst using Standout Property Manager, should you require help or information, please do not hesitate to send an email to our Support Team. The email address is support@issl.co.uk and a support ticket will be opened in our Technical Support Online System where one of our technicians will contact you in due course.
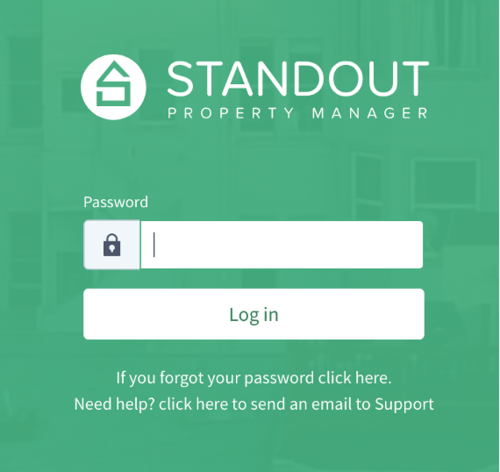
Click Continue.
Enter your password and then click Log in.
2nd Factor Authentication
If 2nd factor authentication is enabled on your account you will need to enter the 6-digit code to proceed, you will need your smart phone at this point. 2nd Factor Authentication is an advanced security system that prevents access to your account unless you have the time limited code.
Google Authenticator is available in both Google Play Store and Apple App Store.
2nd factor authentication is enabled in your Profile Configuration
Office 365 Login
Standout can now link appointments created in Standout in your Office 365 Calendar. Click Login to Office 365 button, you will initially enter your password and if successful, you will be re-directed back to Dashboard and be informed all appointments created, edited or deleted will also replicate to your Outlook Calendar. If you create an appointment for a colleague, it will show in your Outlook calendar and inform you that you are not required to attend (such as a valuation or viewing). If you wish to disconnect Standout from Office 365, click the Logout of Office 365 button. When you next log in, Standout will look at all your future appointments and if not replicated to your Outlook calendar, Standout will replicate them.
Dashboard
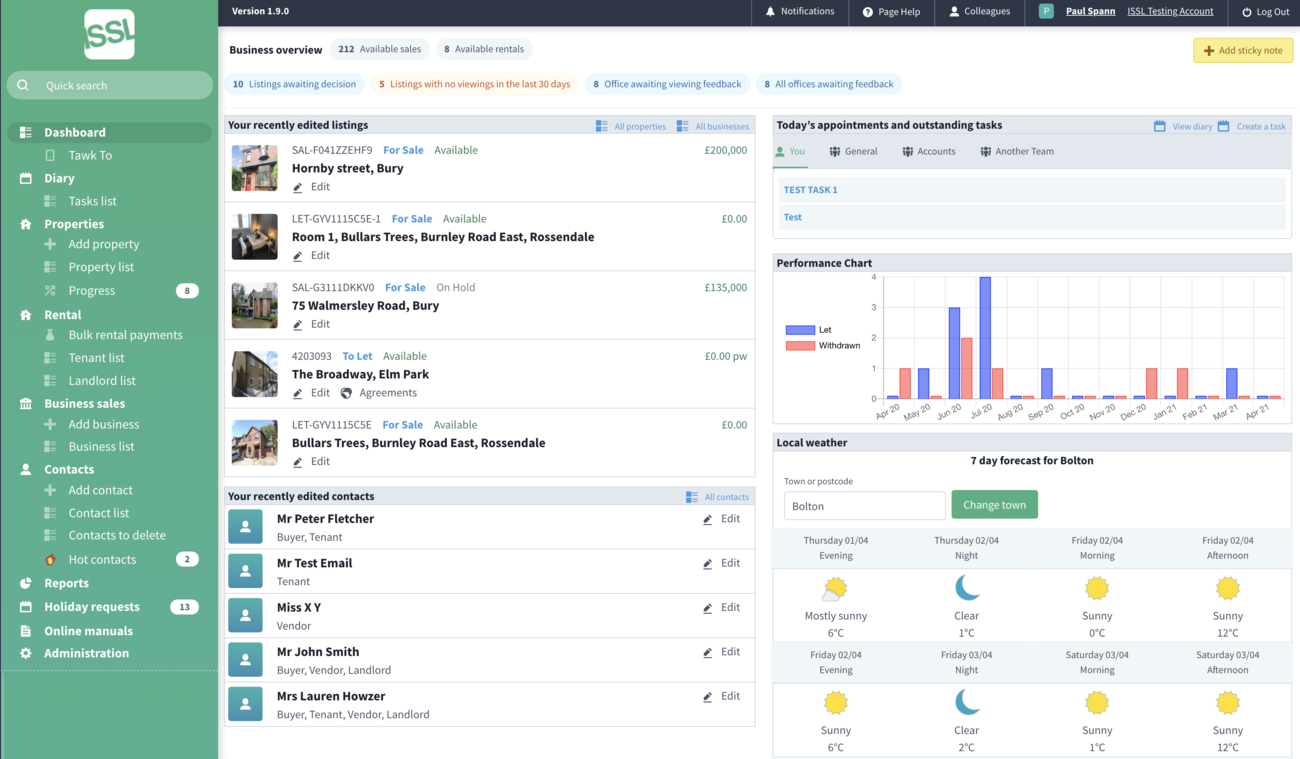
The Dashboard is the default screen and where will come back to. There are six parts to this screen.
Dashboard options run down the left side
Status Bar – runs across the top
Office 365 - a new button near the top left of the screen will allow you to link Standout to Office 365. Appointments created in Standout when you are logged in, will automatically be created (or updated) in your Outlook Calendar. Please note: do NOT edit appointments created by Standout in Outlook, always edit in Standout so that these appointments are automatically updated in Outlook Calendar.
Dashboard quick views
Business Overview – shows relevant information regarding your properties. These will appear as more data is entered into the system
Your recently edited listings
Today’s appointments and Tasks
Your recently edited contacts
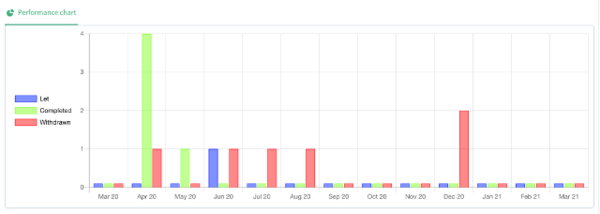
Performance chart
This will show you all the properties that have a status of Sales Completed / Rentals Let / Withdrawn
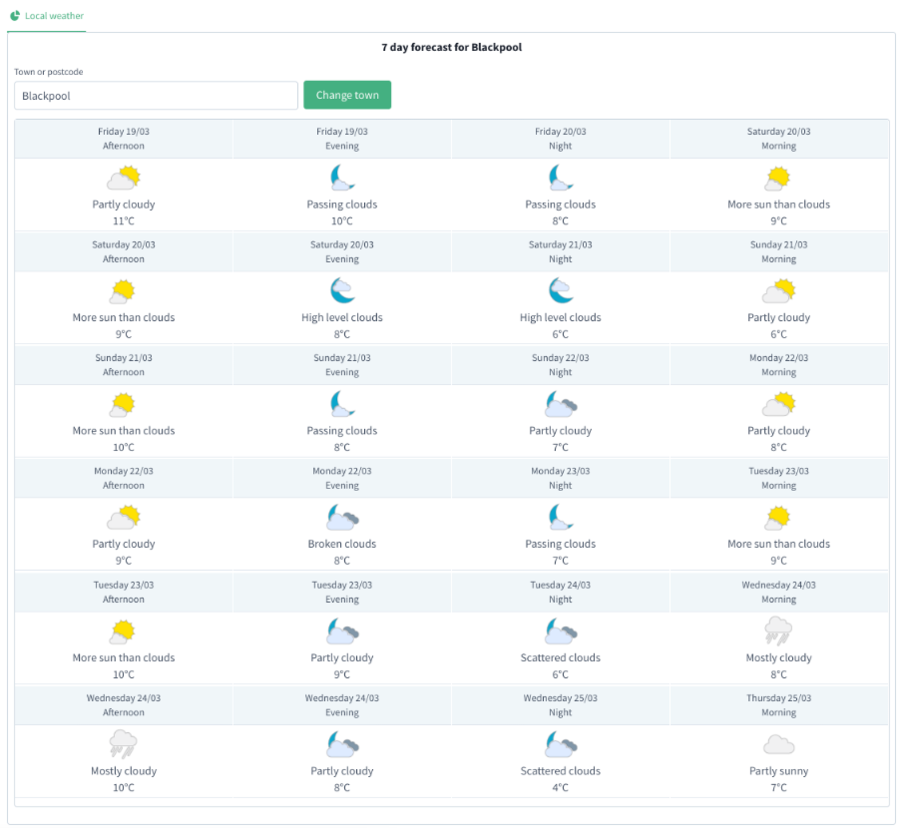
Local weather
This will show a 7 day weather forecast at your office town. You can then change this for a postcode or town of your choice. This has been added to allow you to check the weather when photographing a property and choose the potential best day for outside photographs.
Dashboard options
Tawk to integrated web chat client Tawk To – allows agents to chat with website users visiting your website (when implemented)
Diary an internal diary to store all appointments and diarised items
Properties
Add property add a new property onto the system
Property List list all properties on the system with a given criteria
Progress list all properties with progress markers against them
Rental
Bulk rental payments enter daily payments for rental payments
Tenant list show all tenants (with active tenancy agreements)
Landlord list show all landlords (with active tenancy agreements)
Businesses
Add Business should you sell businesses, enter these in this section
Business list list all businesses on the system with a given criteria
Contacts
Add contact add a new contact onto the system
Contact list list all contacts on the system with a given criteria
Contacts to delete list all contacts that you are able to remove from the system
Hot contacts those contacts that you deem to be a hot contact
Reports various reports that extract data from the system to either Spreadsheet or PDF.
Holiday Requests those users that are able to approve or deny holiday requests will
See this option appear once staff members place a holiday request.
Administration all the administration options to configure your agency, branches, staff and various other options
Status bar
Version the systems version number, by clicking this option, shows you all the versions and improvements.
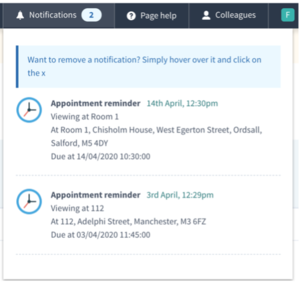
Notifications a quick view of all the system notifications, including diary appointments.
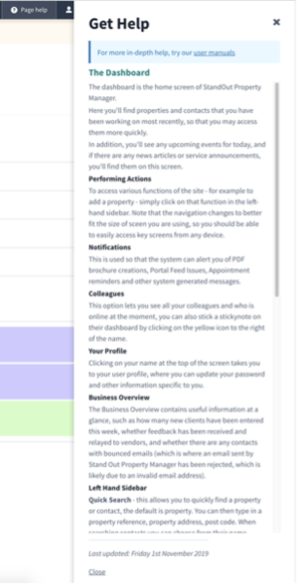
Page help throughout the system, clicking this should show help information regarding the section that you’re working on.
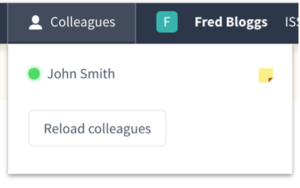
Colleagues shows colleagues that are logged onto the system
Your name clicking this gives access for editing your profile (opens in a new tab)
Log Out when you finish using the system, then log out for security
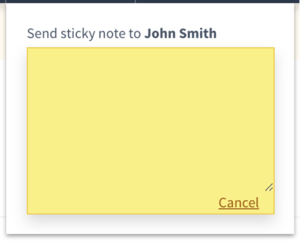
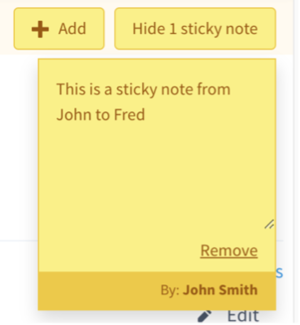
Sticky Notes create a post-it note type note on your desktop for reminders etc You can also create and store sticky notes in contacts and properties Within the notes tab.
Business overview
The Business Overview contains useful information at a glance, such as how many new clients have been entered this week, whether feedback has been received and relayed to vendors, and whether there are any contacts with bounced emails (which is where an email sent by Stand Out Property Manager has been rejected, which is likely due to an invalid email address).
Examples are
Available sales
Available rentals
listings awaiting decision
listings with no viewings in the last 30 days
Agent awaiting viewing feedback
Vendors/Landlords awaiting viewing feedback
Contacts with bounced emails
Your recently edited listings
This section shows a list of properties you’ve recently edited, showing their contract, address, status.
Your recently edited contacts
This section shows a list of recent contacts and their definition on the system.
Today’s appointments
Shows appointments for yourself, and teams that you are assigned to.
Version Control – Important Note
As versions are implemented regularly (usually monthly), we do recommend that you read the release notes. The version will flash until you click on it but is important to view this information as if you have recommended a system change or improvement, will let you know what has been released.
Notifications
When you have notifications a “pill” will appear with the number of notifications, if you wish to delete them, simply hover over it and click on the x for it to be permanently deleted.
Page Help
Throughout Standout, each page has its own page help to assist with you when completing the entries on that page.
Colleagues – sending quick messages
Standout has the ability to send notes to other members of your branch, by clicking on the staff member you will see:
| Sending a note: | Receiving a note: |
Getting Started with your Clients
When you have a new client, this section will advise on the processes to follow for the following:
Selling a Property
Buying a Property
Letting a Property
Renting a Property
Selling a Property (Vendor)
When a client wishes to use your services to sell their property, we recommend the following:
Enter the property – Pre-Valuation stage
Enter the contact – link to the property
Book Valuation appointment
Enter property details, photos and valuation
Once accepted, place property as Available (on website/portals)
See below (Buying a Property)
During each stage Standout will allow you:
Create advertising brochures for your window, hand out to clients or email as a PDF attachment.
Create Letters/Documents for clients, solicitors, contractors. Every Letter can be modified for your agency, this is all within the Administration/Letter Templates.
Buying a Property (Purchaser)
Enter contact details
Book viewing
Update system with viewing feedback
Place and offer – Repeat if offer isn’t accepted
Accept offer
Send contracts
Finialise the Sale (SSTC)
Completed – once everything has been exchanged
During each stage Standout will allow you:
Create advertising brochures for your window, hand out to clients or email as a PDF attachment.
Create Letters/Documents for clients, solicitors, contractors. Every Letter can be modified for your agency, this is all within the Administration/Letter Templates.
Letting a Property (Landlord)
When a client wishes to use your services to let their property, we recommend the following:
Enter the property – Pre-Valuation stage
Management option:
No – client only uses you to obtain a tenant
Rent collection – you collect the rent on behalf of the Landlord
Yes – you look after the property on behalf of the Landlord and are responsible for all agreed arrangement.
Enter the contact – link to the property
Book Valuation appointment
Enter property details, photos and valuation
Once accepted, place property as Available (on website/portals)
See below (Letting a Property)
During each stage Standout will allow you:
Create advertising brochures for your window, hand out to clients or email as a PDF attachment.
Create Letters/Documents for clients, solicitors, contractors. Every Letter can be modified for your agency, this is all within the Administration/Letter Templates.
Renting a Property (Applicant/Tenant)
Enter contact details
Book viewing
Update system with viewing feedback
Place and offer – Repeat if offer isn’t accepted
Accept offer
Create Rental Agreement
Finialise the Letting (Let)
Use Bulk Payments or the Financials Tab within a Property/Rental Agreement
Additional Contacts
Standout can also help with the following additional contacts:
Solicitors
Contractors
Rental Guarantor

